Most home inspectors give the floor a quick walk and call it good. They’re not living with the results. I am. After running crews through hundreds of old Cleveland kitchens and baths, the subfloor is where many jobs go sideways.
A weak or damaged subfloor makes your new finish floor squeak, dip, or fail within a couple years. In these Rust Belt houses from the 40s to 70s, it’s one of the most common hidden money pits.
The test is simple, but you have to know what to look for before the new flooring goes down.
Why Subfloor Matters More Than People Think
Your beautiful new hardwood, tile, or LVP sits on whatever is underneath. In old houses, that’s often original 1x6 tongue-and-groove boards or early plywood that’s seen decades of foot traffic, leaks, and settling.
Cleveland winters with freeze-thaw cycles make things worse. Moisture gets in from plumbing, poor flashing, or basements. Once the subfloor loses integrity, nothing on top lasts.
I’ve torn out brand-new kitchens because the homeowner cheaped out on subfloor prep. New tile cracked. Hardwood cupped. Not worth it.

The Subfloor Test I Use on Every Job
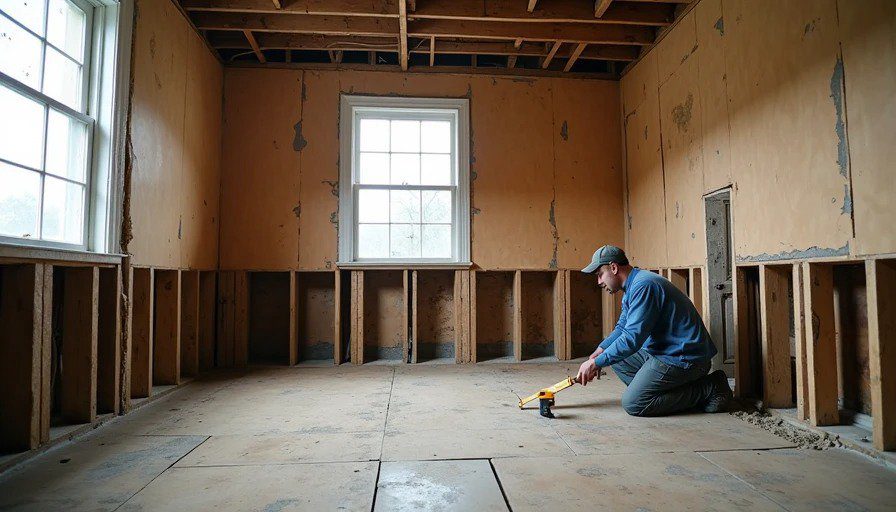
When my crews opened a floor, here’s exactly what we checked:
Visual and Walk Test
Walk the entire area slowly. Feel for soft spots, bounciness, or squeaks. In an old house, some movement is normal, but excessive flex means trouble.
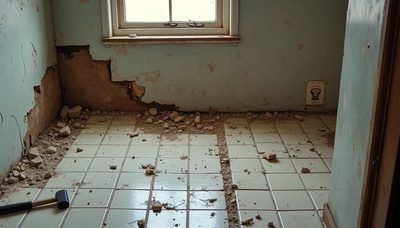
Look for stains, mold, or delamination. Water damage near sinks, dishwashers, or exterior walls is common.
Probe and Measure
Use a screwdriver or awl to test softness in suspect areas. Not destructive poking — just enough to feel resistance.
Check thickness. Old stuff is often 3/4" but worn or patched. Modern code likes 3/4" minimum for most spans, thicker for tile.
Measure deflection. A straight 8- or 10-foot board or laser level shows high and low spots. More than 1/4" variation over 10 feet usually needs correction.
Joist Check from Below (If Accessible)
In basements or crawlspaces, look up. Sistered joists, rot at ends, or overspanning are red flags. Cleveland clay soil settles unevenly.
Moisture meter on the underside tells the real story.
Common Subfloor Problems in Cleveland Old Houses
These keep showing up:
Water Damage Near Plumbing: Old galvanized or cast iron leaks slowly over years. Subfloor rots from below. You won’t see it until demo.
Undersized or Spaced Joists: Original construction sometimes skimped. Modern tile or stone needs stiffer support.
Plywood Delamination: Older sheets swell and come apart with moisture.
Patchwork Repairs: Previous owners threw down particle board over problems. That stuff fails fast.
Asbestos or Lead Concerns: Some old underlayments or adhesives contain hazards. Test if suspicious.
One job in a 1950s bungalow looked fine on top. Underneath? Half the kitchen subfloor was spongy from a dishwasher leak that went unnoticed for years. We had to sister eight joists and replace 60% of the plywood. Added $4,800.
What Good Subfloor Repair Looks Like
Don’t just patch. Do it right.
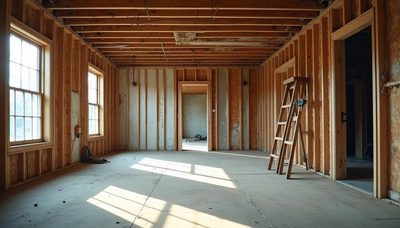
Remove all damaged material back to solid wood.
Sister joists with same-size lumber, glued and bolted or screwed.
Install new 3/4" or 5/8" plywood, staggered seams, glued and screwed every 6" on edges, 8-12" in field.
Use construction adhesive liberally.
Level everything. Self-leveling compound if needed for tile.
Allow for expansion gaps where required.
For tile floors, many pros add a second layer or cement board for rigidity.

Rough Cost Guide in Cleveland 2026 (per square foot, labor and materials)
Repair Type | Cost Range | When It Applies |
|---|---|---|
Minor patches | $8–$15 | Small soft spots |
Full subfloor replacement | $18–$32 | Widespread damage |
Joist sistering | $25–$45 | Structural issues |
Plus leveling compound | $4–$8 | For tile/stone |
On a 150 sq ft kitchen, expect $3,000–$8,000 if problems are average. Better to know before you sign.
When the Inspector Misses It
Inspectors do visual and basic walk-throughs. They rarely pull up flooring or crawl under unless obvious red flags. That’s why you need your contractor doing this deep check during the bidding and demo phase.
A good GC will include subfloor evaluation in the scope and price accordingly. Cheap bids often assume “existing subfloor is fine” and hit you later.
Lessons from the Field
I once bid a job assuming minor fixes. Opened it up and found extensive rot under the old vinyl. We ate part of the cost because I didn’t probe deep enough pre-bid. Client was understanding, but it stung.
On my own 1920s Colonial, the kitchen floor had settled over decades. I lived with squeaks for years before fixing it properly. Should have done it right the first time.
Homeowners who push “just put new floor over it” regret it. I’ve demo’d plenty of those “professional” jobs where the subfloor was ignored.
How to Protect Yourself
Insist on subfloor inspection as part of the bid process. Walk it with the contractor.
Ask for photos and notes on any issues found.
Get the repair scope and price in writing before new materials arrive.
For tile or heavy finishes, require extra stiffening.
Budget 5-10% contingency specifically for floor structure.
If the house has a basement, spend time down there looking up. Flashlight and moisture meter are cheap insurance.
The subfloor test isn’t glamorous, but it’s one of the smartest things you do before spending on pretty finishes. In old Cleveland houses, ignoring it guarantees callbacks and regret.
A solid subfloor makes everything else last. Skimp here and you’re throwing money away.
Do the test early. Fix it right. Your new kitchen or bath will thank you every time you walk across it.
Next I’ll talk about tile on tile shortcuts and why they usually cost more in the end.
Of course, I've screwed up plenty of jobs too. That's why I'm telling you this.
No signatures yet — be the first!